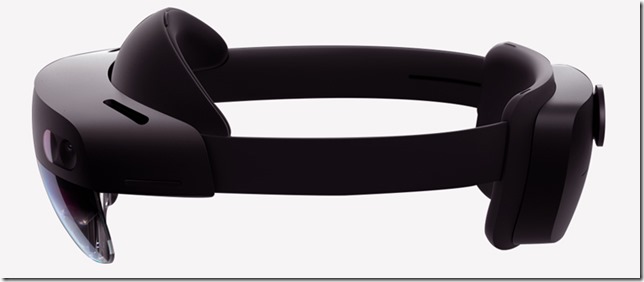
The HoloLens 2 toolchain is under continuous development. In addition, the development of the Mixed Reality Toolkit (MRTK), the developer kit for HoloLens, must be synced with the continuous development of the Unity Game Engine. For these reasons, it is necessary for developers to be careful about using the correct versions of each tool in order to avoid complications.
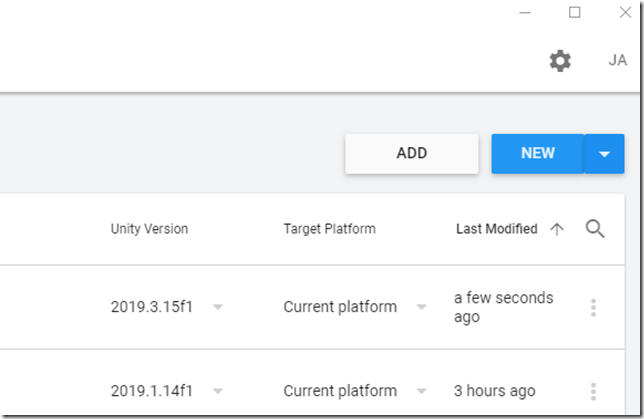
As of February, 2021, I’m doing HoloLens development with Visual Studio 2019 v16.5.5, Unity Hub 2.4.2, Unity 2019.4.20f, Mixed Reality Feature Tool 1.0.2102 beta, MRTK 2.5.4 + MRTK 2.6.0-preview, and Windows 10 Pro 10.0.18363.
MRTK, MR Feature Tool beta, and the new Unity XR SDK pipeline
The most accurate documentation on getting started with HoloLens 2 development, at this time, is found in the MRTK github repository and on Microsoft’s MR Feature Tool landing page. There are nevertheless some gaps between these two docs that it would be helpful to fill in.
The new Unity XR SDK pipeline is a universal plugin framework that replaces something now known as the legacy Unity XR pipeline. Because of all the moving parts, many people have trouble getting the new pipeline working correctly, especially if they have not kept up with the changes for a while or if they are new to the HoloLens 2.
You will want to download Unity Hub if you don’t have it already. Unity Hub will help you manage multiple versions of Unity on your development machine. It is fairly common to switch between different versions of Unity if you are working in VR and Mixed Reality as you go back and forth between older versions for maintenance and pursue newer versions for the latest features. As a rule, never upgrade the Unity version of an existing project if things are working well enough.
Create a new unity project
Use the Unity Hub Installs tab to get the latest version of Unity 2019.4, which you will need in order to successfully work with the latest MRTK. Later versions of Unity will not currently work for developing HoloLens 2 applications with the MRTK 2.5.4. Versions earlier than Unity 2018.4 also will not work well.
Some of the documentation mentions using Unity 2020.2 with OpenXR. This is something totally different. Just ignore it.
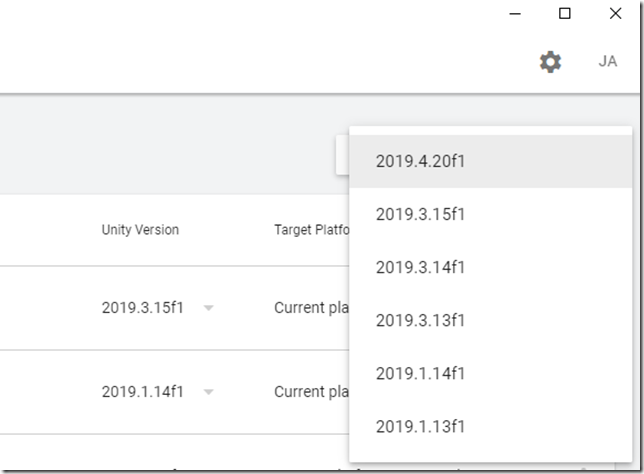
Start by creating a new Unity 2019.4 project.
When you do this from Unity Hub, you can use the pull down menu to select from any of the versions installed on your development computer.
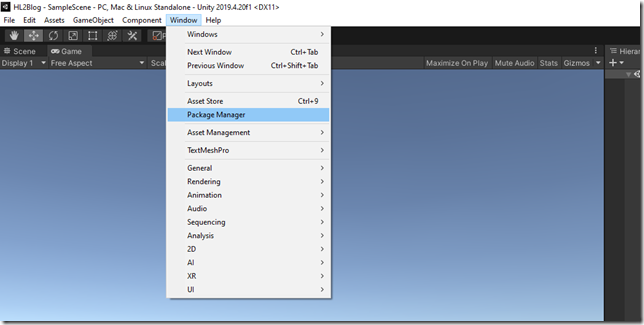
When your Unity app has been created, open the Unity Package Manager from the Windows menu.
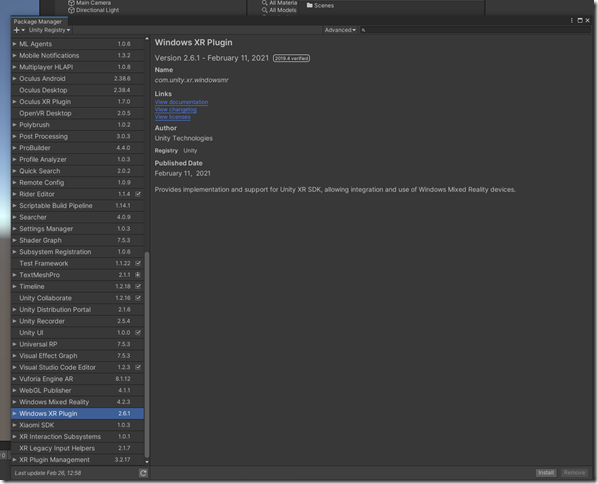
In Package Manager, select the Windows XR Plugin in the left panel. Then click the Install button in the lower left corner of the main panel.
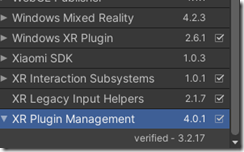
This will also install the following components automatically: XR Interaction Subsystems, XR Legacy Input Helpers, and XR Plugin Management.
*** Notice that the component called Windows Mixed Reality is not installed. Don’t touch it. This is a left over from the legacy Unity XR pipeline and will eventually be removed from Unity. You will use a different method to get the MRTK into your project. ***
Configure project settings for HoloLens 2
You should now edit your project settings. Open the project settings panel by selecting Edit | Project Settings in the menu bar.
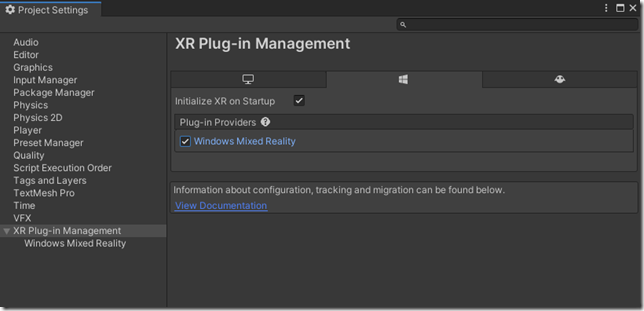
1. Select XR Plug-in Management in the left-hand pane and then, in the main window, check off Windows Mixed Reality to select it as your plug-in provider. This lets the new XR SDK pipeline work with your MRTK libraries (which you will import in the next section).
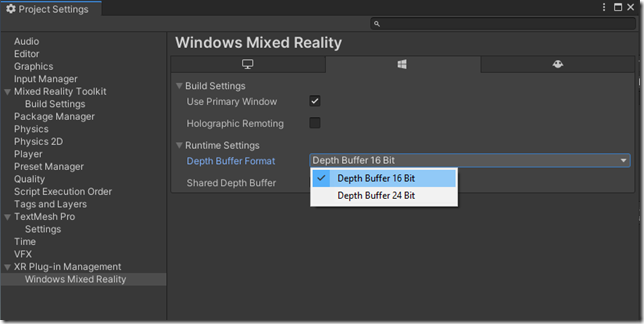
2. Under XR Plug-in Management, select the Windows Mixed Reality entry in the left-hand pane. Make sure Depth Buffer 16 Bit is selected as your Depth Buffer Format and that Shared Depth Buffer is checked off. This will improve the performance of your spatial computing application.
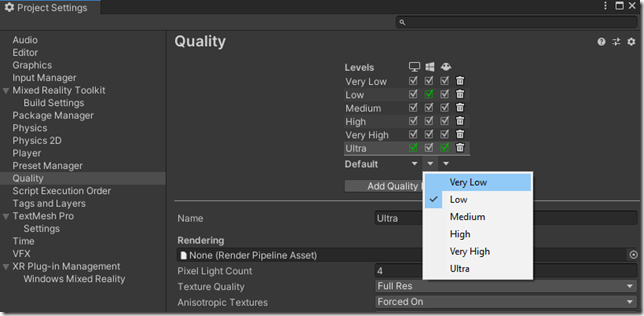
3. Select Quality in the left-hand pane. To improve performance, click the down arrow under the Windows logo to set your default quality setting to Low for your spatial computing application.
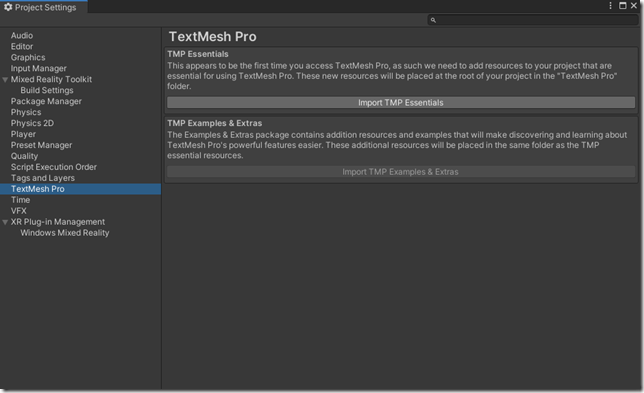
4. While you are configuring your project settings, you might as well also import TextMesh Pro. Select TextMesh Pro in the left-hand pane and click on the Import TMP Essentials button in the main window. TMP will be useful for drawing text objects in your spatial computing application.
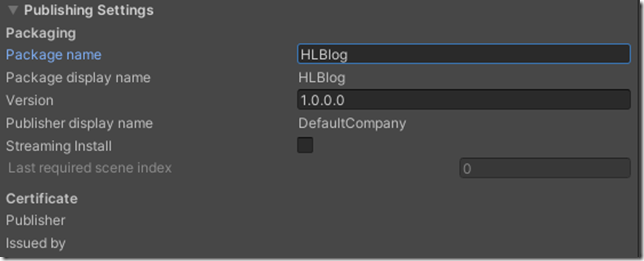
5. Select Player in the right-hand pane to edit your player settings. Change the Package name entry to something relevant for your project. (The project name is how the HoloLens identifies your application. If you are quickly prototyping and deploying projects and forget to change the package name, you will get an obscure message about saying your Template3D package is already installed. This is just the default package name on all new Unity projects.)
You are now ready to import the Mixed Reality Toolkit.
Retrieve MRTK components with MR Feature Tool
The HoloLens team has created a new tool called the Mixed Reality Feature Tool for Unity to help you acquire and deploy the correct version of the MRTK to your project.
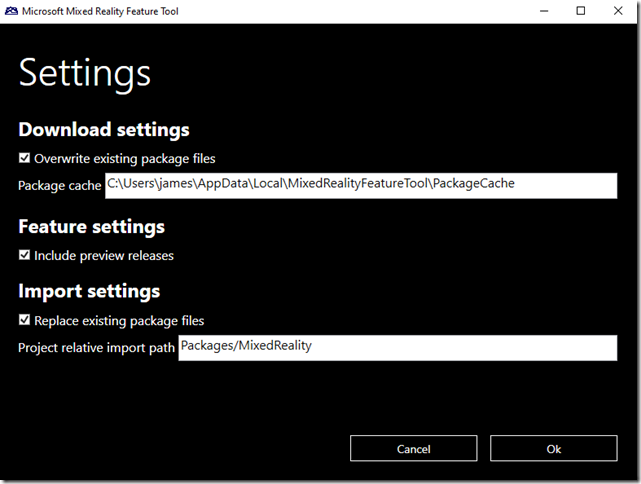
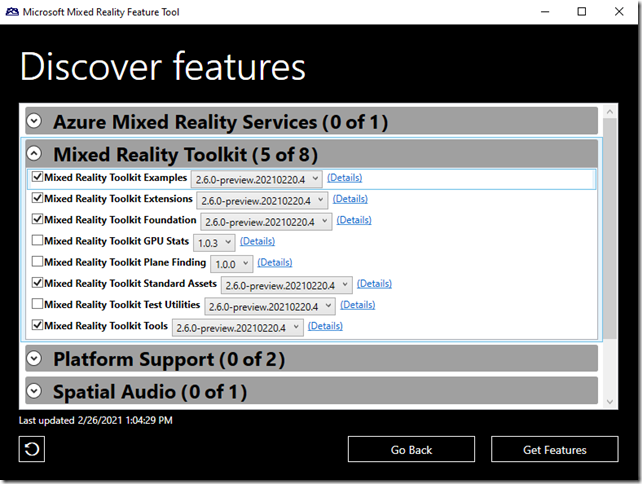
1. After downloading the feature tool, you can go into settings and check off the Include preview releases box in order to get the 2.6.0-preview.20210220.4 build of MRTK. Alternatively, you can use MRTK version 2.5.4 if you are uncomfortable with using a preview build.
2. Follow the wizard steps to select and download the MRTK features you are interested in. At a minimum, I’d recommend selecting the Toolkit Foundation, Toolkit Extensions, Toolkit Tools, Toolkit Standard Assets, and Toolkit Examples.
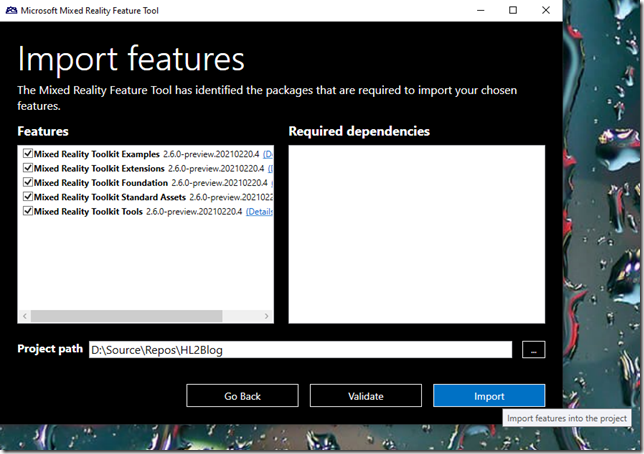
3. On the Import features screen, select the path to your Unity project. Validate that everything is correct before importing the selected features into your Unity HoloLens 2 project.
4. Click on the Import button.
Configure build settings for HoloLens 2
As the MRTK libraries are added to your project, your Unity project may hang while it is being refreshed if you still have it open (which is very okay).
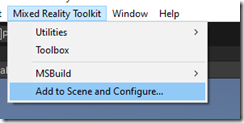
1. When the refresh is done, the Mixed Reality Toolkit item will appear your Unity menu bar.
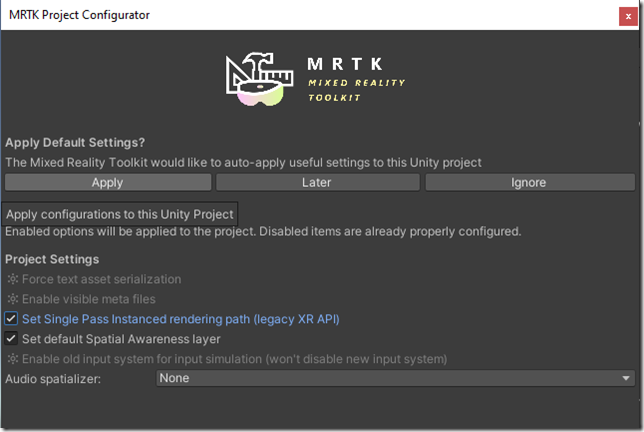
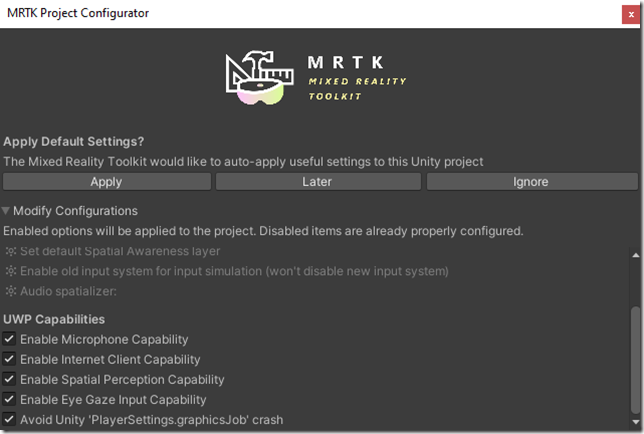
2. At the same time, an MRTK configuration window will also pop up in the Unity IDE. Accept the suggested project setting changes by selecting Apply.
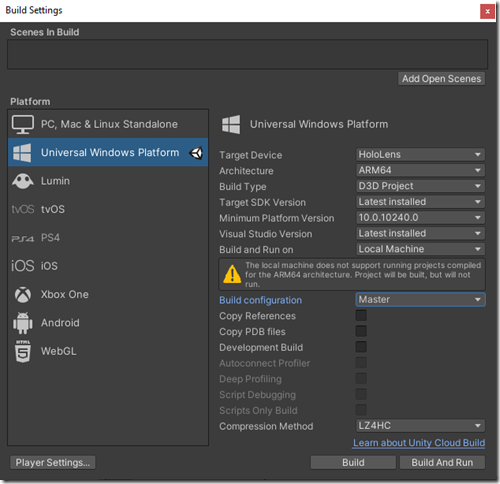
3. Click on File | Build Settings… to open the Build Settings window. Select Universal Windows Platform in the left pane.
4. Upon selecting Universal Windows Platform as your build target, you will be prompted to switch platforms. Click on the Switch Platform button to confirm that you will be building an application for the UWP platform. This will initiate a series of updates to the project that may freeze the IDE as the project is refreshed.
5. After your switch to the Universal Windows Platform, MRTK may prompt you to make additional changes to your project. Apply the recommended changes.
6. For a release deployment, you will want the following build settings:
- Target Device should be HoloLens.
- Architecture is ARM64. This is the processor used in the HoloLens 2.
- Build Type is D3D Project. Any other build type will project a standard 2D UWP window into the HoloLens.
- Build configuration is Master for a release build, rather than a Release, as odd as that seems. This is the most lightweight build you can deploy to your device, and consequently the best performing.
- Compression Method should be LZ4HC for release builds. This takes a lot longer to compile, but is the most efficient in a deployed application.
You can close the Build Settings window.
Summary
This walkthrough is intended to get you through the initial steps for integrating the new Unity XR SDK pipeline with the Mixed Reality Toolkit. For completeness, I will walk you through setting up and deploying a HoloLens scene in the next post.

[…] the New XR SDK Pipeline with HoloLens 2: A Walkthrough (James Ashley) […]
[…] the first part of this series, I provided a detailed walkthrough of setting up a project using new Unity XR SDK […]